Step 2 of 2

NeuroHand 2.0 classroom guide

Connect your hand on Mac.

Follow these steps in order. You’ll install mLink 2, clean up the default mBlock project, add the correct Arduino Uno hand, and select its USB port.

Before you start

Have these four things ready.

Step 1

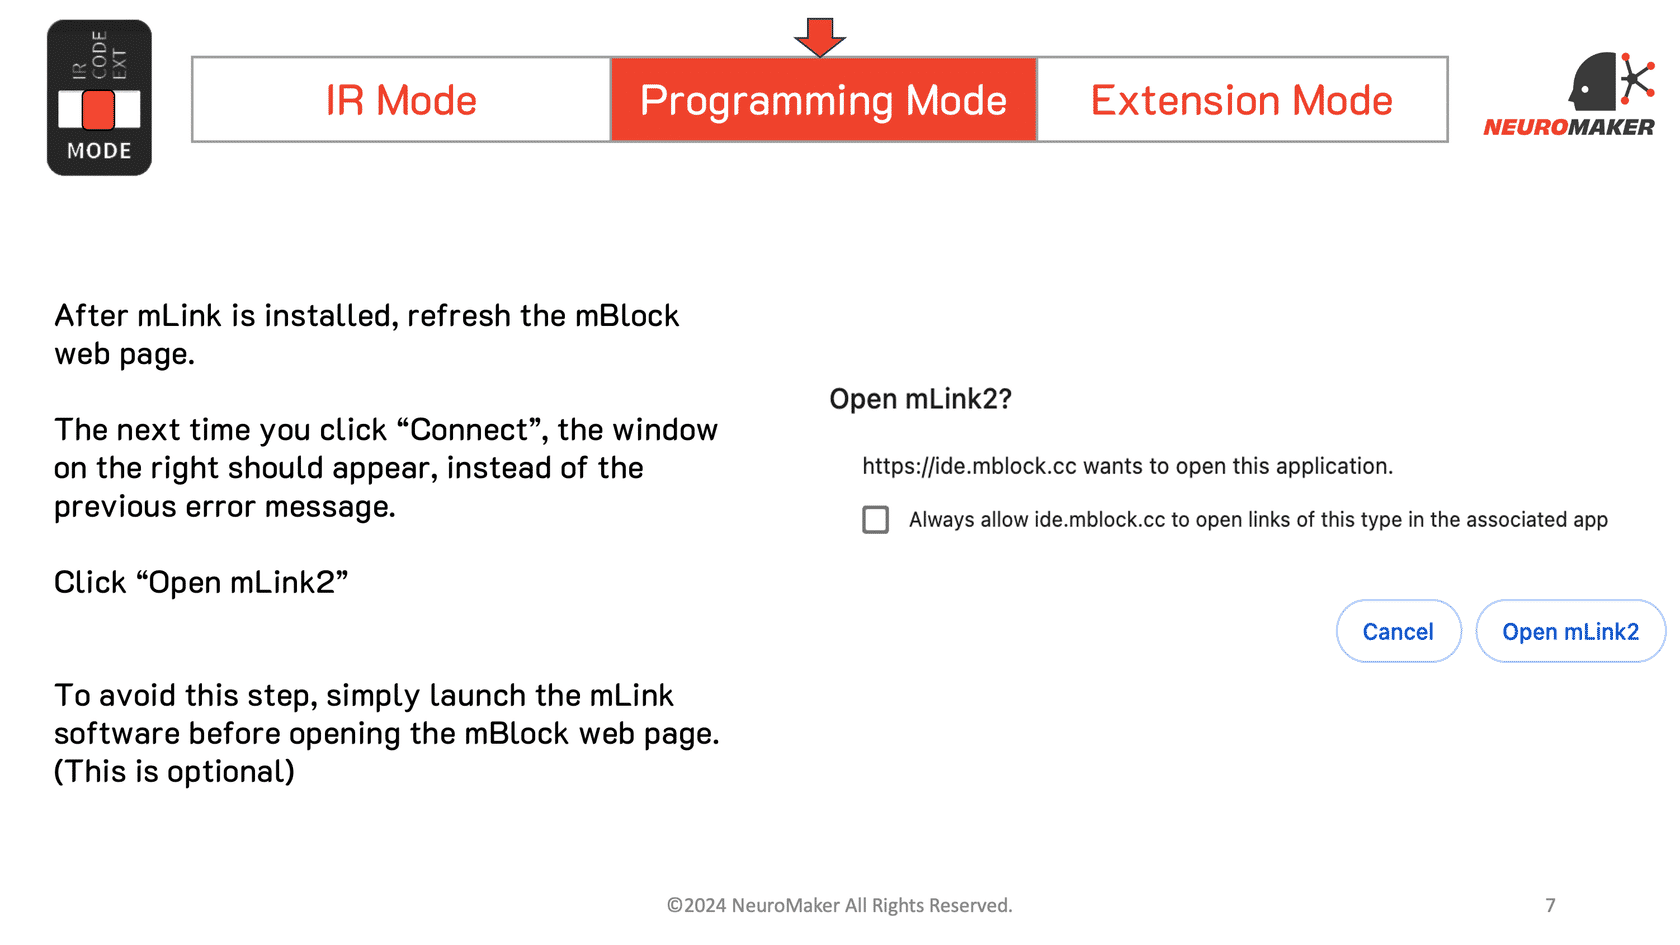
Install and open mLink 2 for Mac

Open the downloaded mLink2…dmg file and follow the installer window. Launch mLink 2 from Applications. If macOS blocks it, use System Settings → Privacy & Security only after confirming the file came from Makeblock, or ask your school’s IT administrator.
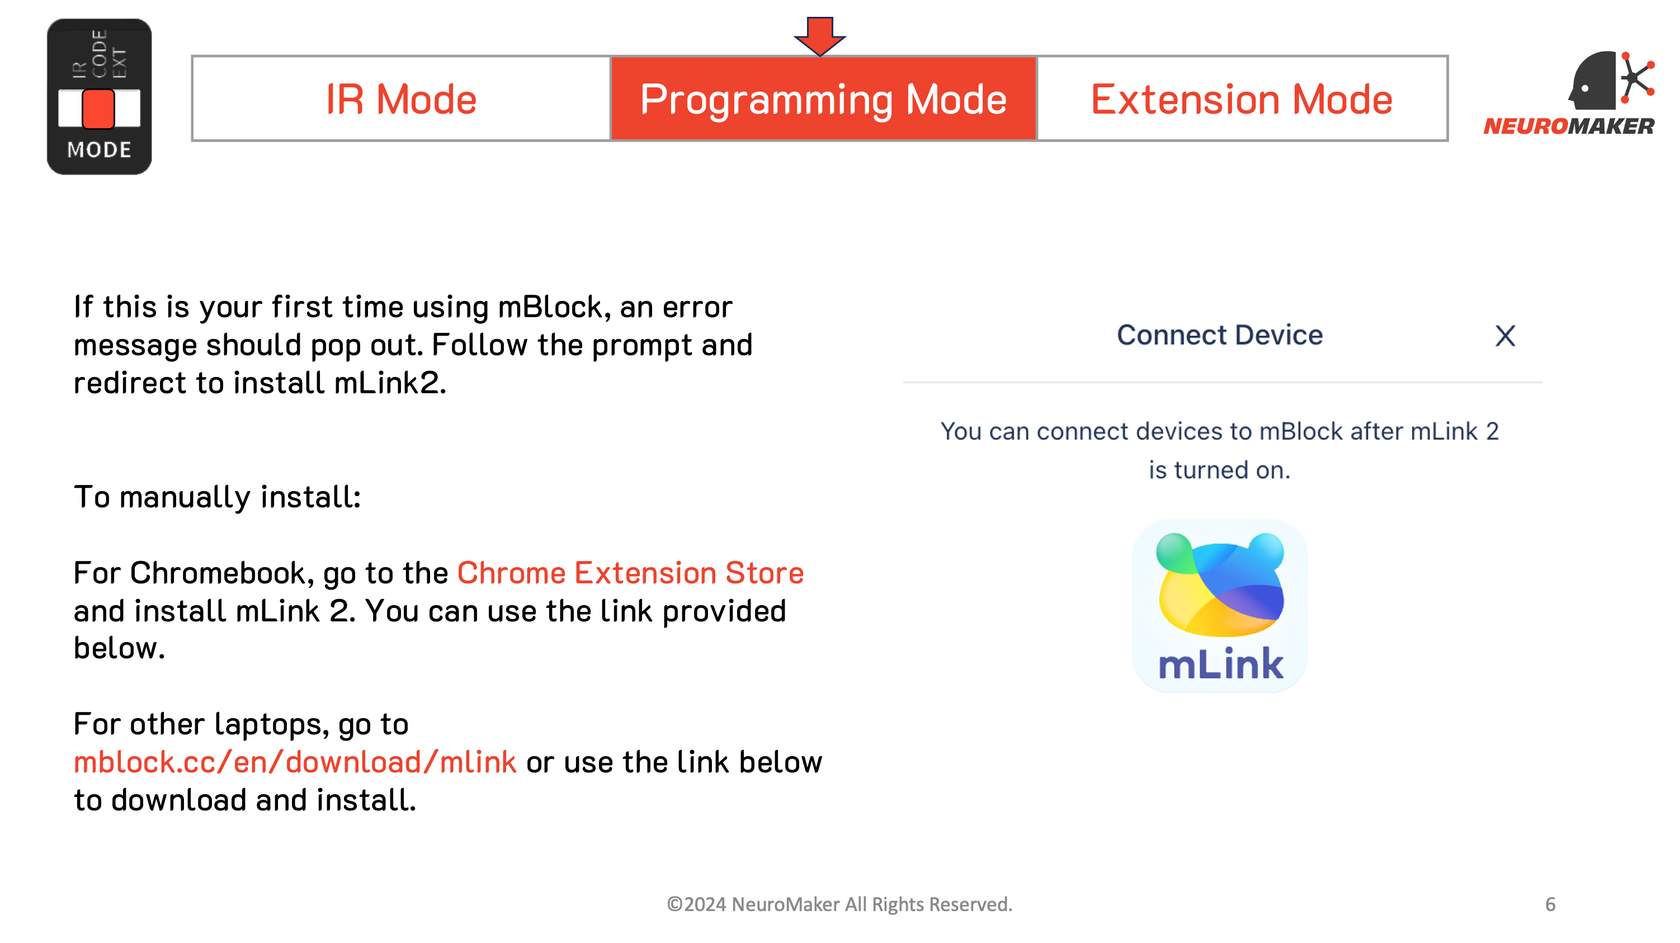
Official NeuroMaker guide showing the mLink 2 download step
Official NeuroMaker reference screen. The live interface may look slightly different.

Step 3

Set the hand to CODE mode

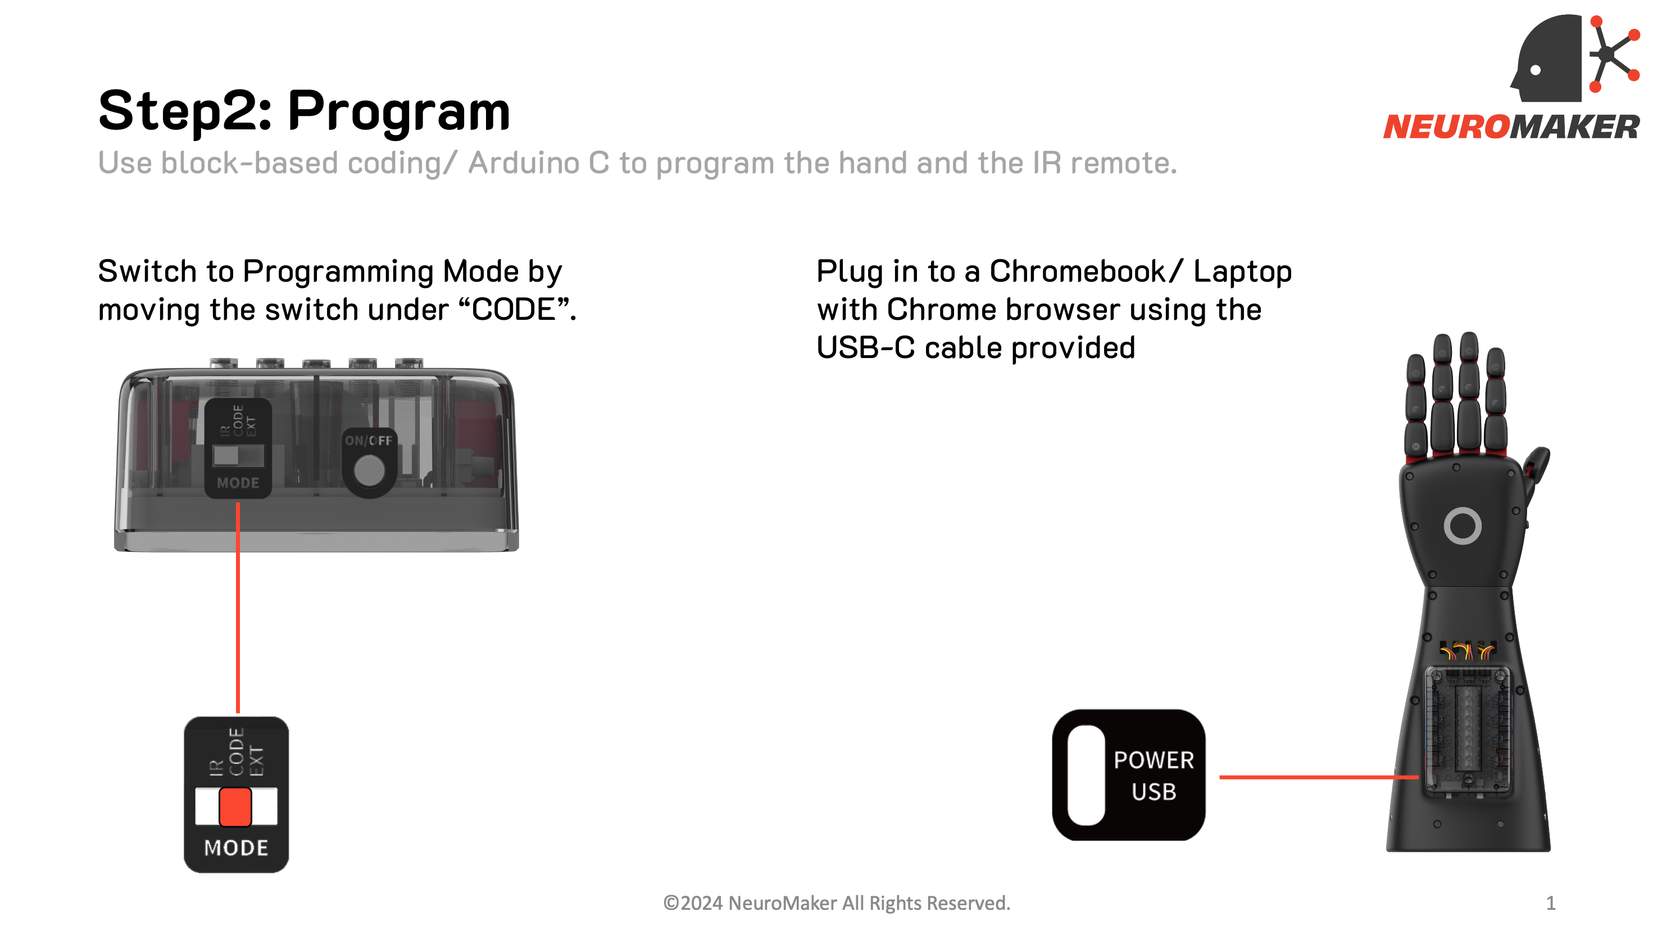
Move the NeuroHand 2.0’s mode switch to the middle CODE (Programming) position. Connect a data-capable USB-C cable to the port marked Power/USB, then turn the hand on.
NeuroMaker HAND set to Programming mode with USB connected to the Power USB port
Official NeuroMaker reference screen. The live interface may look slightly different.

Step 4

Open mBlock in Chrome

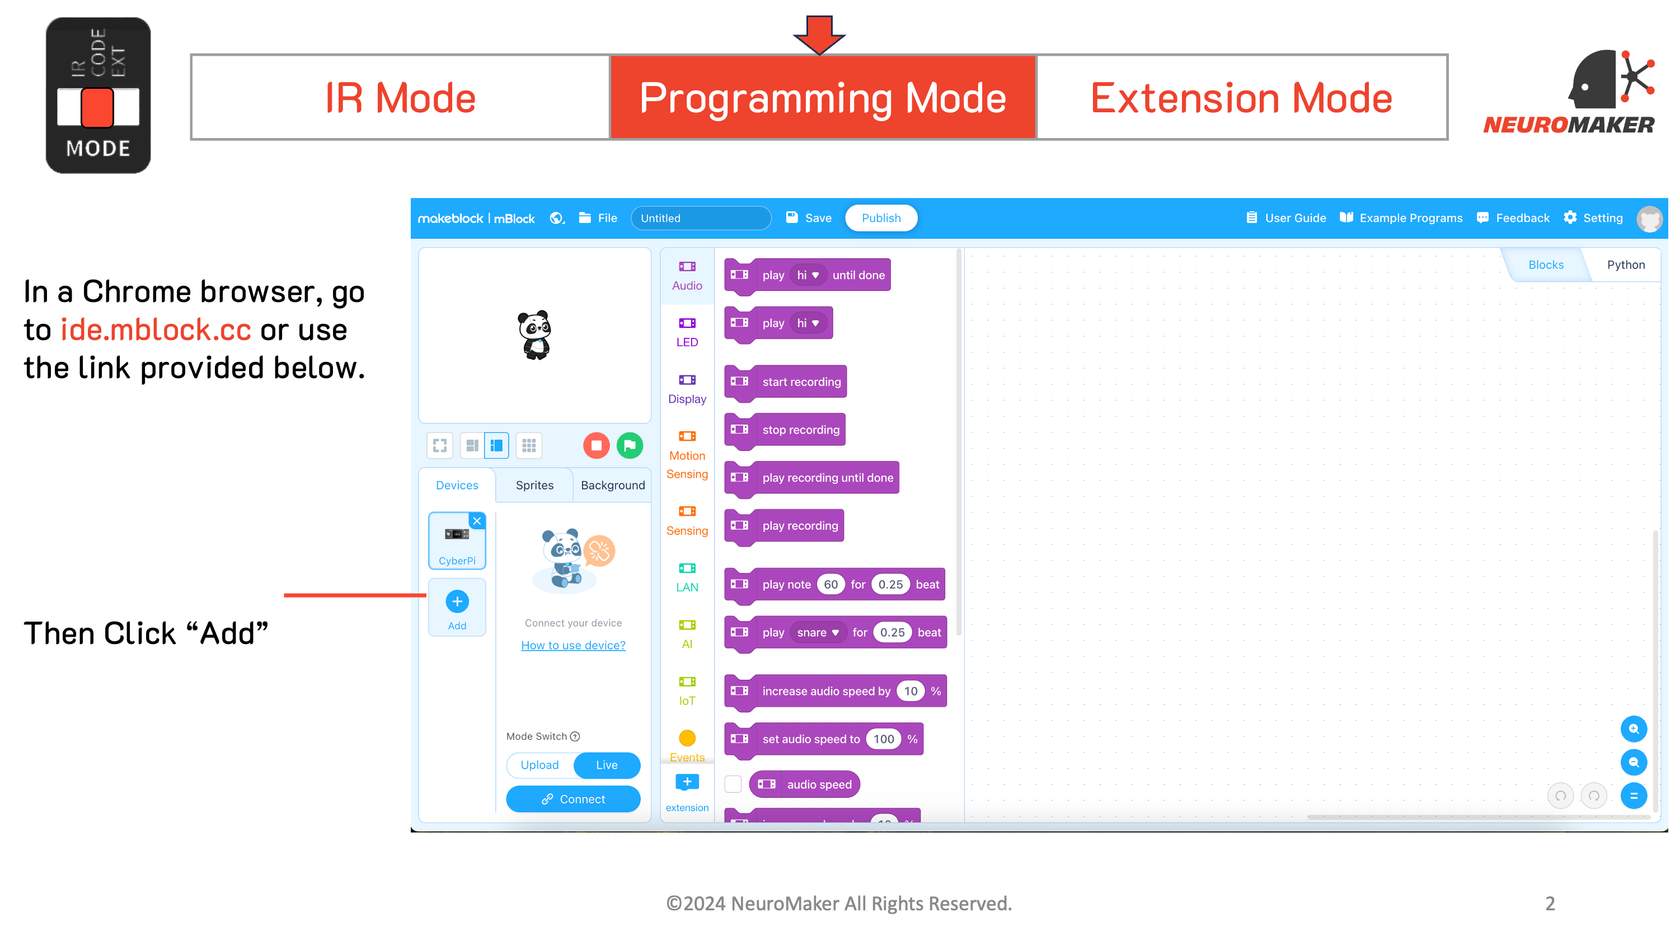
In the freshly restarted Chrome window, go to ide.mblock.cc. Choose the web editor if prompted.
mBlock web editor with the Add device button highlighted
Official NeuroMaker reference screen. The live interface may look slightly different.

Step 5

Close the default Panda sprite

Select Sprites near the lower-left corner. On the Panda card, click the small blue × to close the default sprite. Return to Devices.

Step 6

Add the NeuroHand device

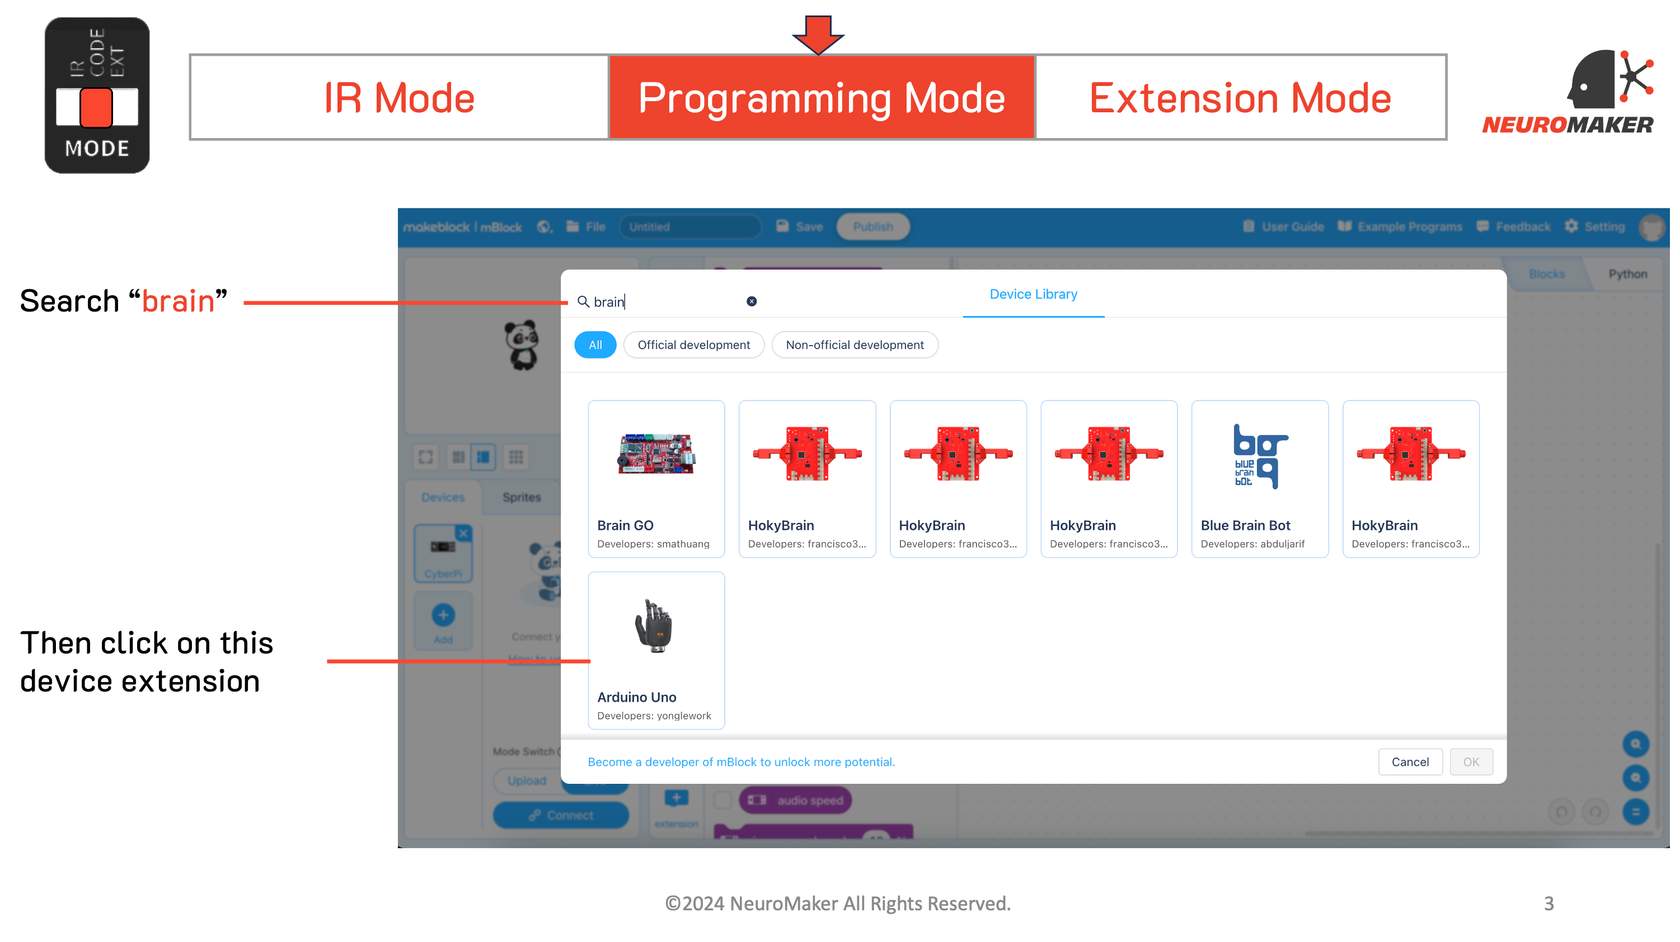
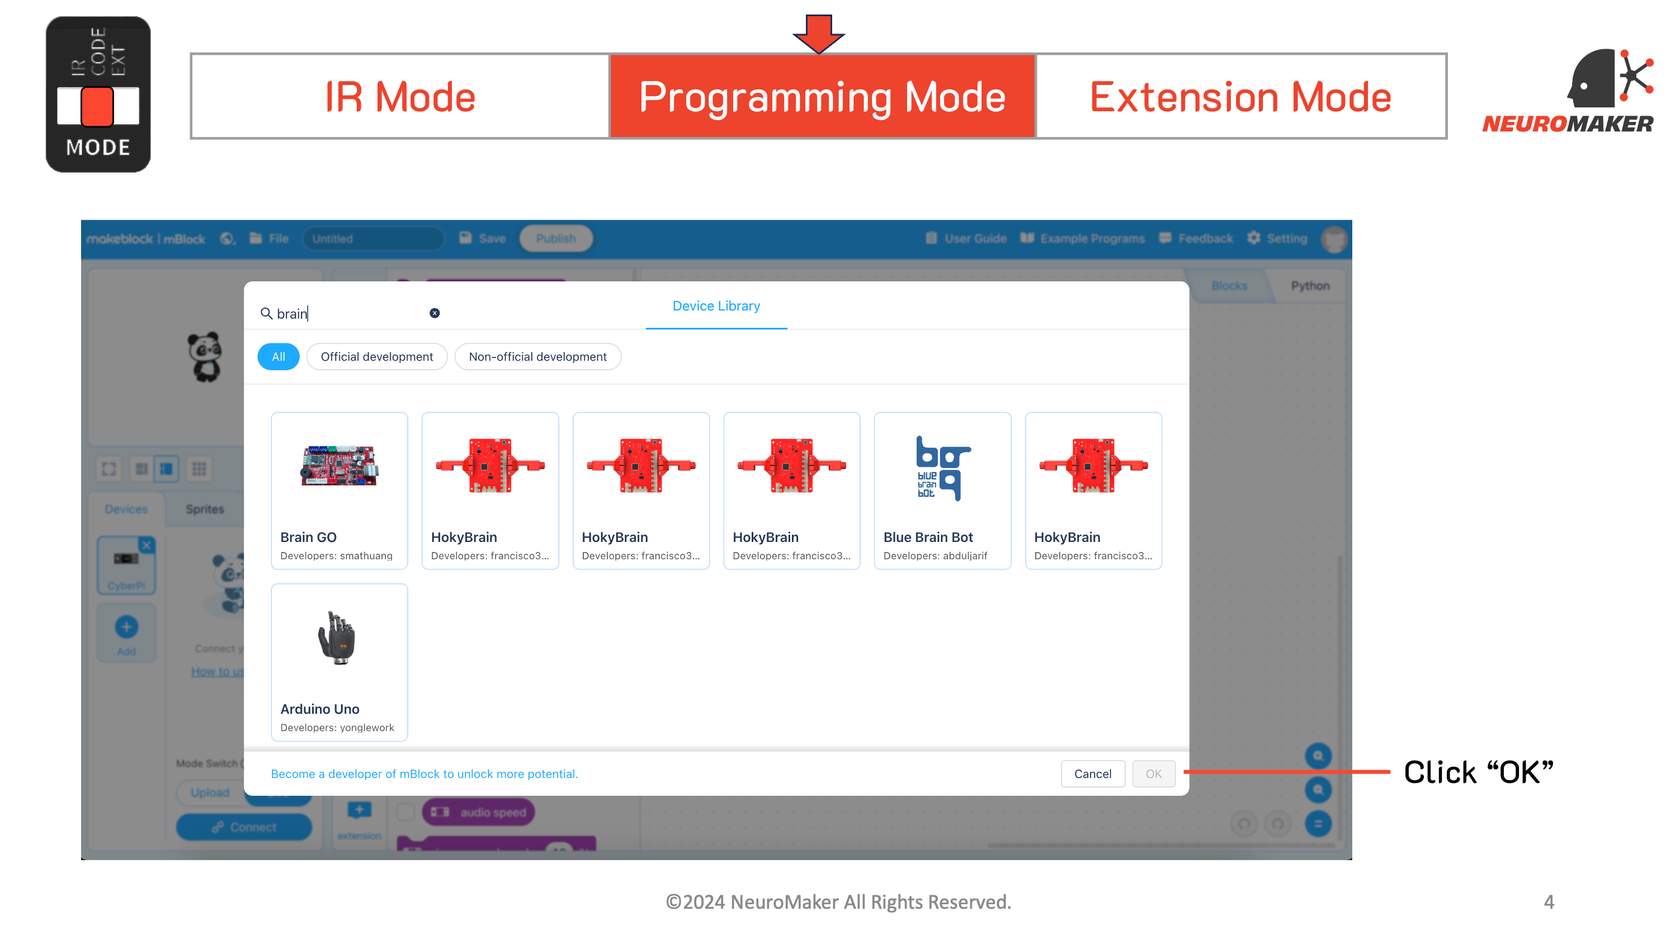
Click Add under Devices. Search for brain, select the black hand tile named Arduino Uno (shown by developer yonglework), and click OK.
mBlock device library search results for brain showing an Arduino Uno NeuroMaker hand tile
Official NeuroMaker reference screen. The live interface may look slightly different.

Step 7

Confirm Arduino Uno

Make sure the hand-shaped Arduino Uno tile is selected, then click OK. The Finger Movements, Gestures, BioSensor, and Pin categories should load.
Arduino Uno NeuroMaker hand tile selected with the OK button highlighted
Official NeuroMaker reference screen. The live interface may look slightly different.

Step 8

Switch the editor to mLink

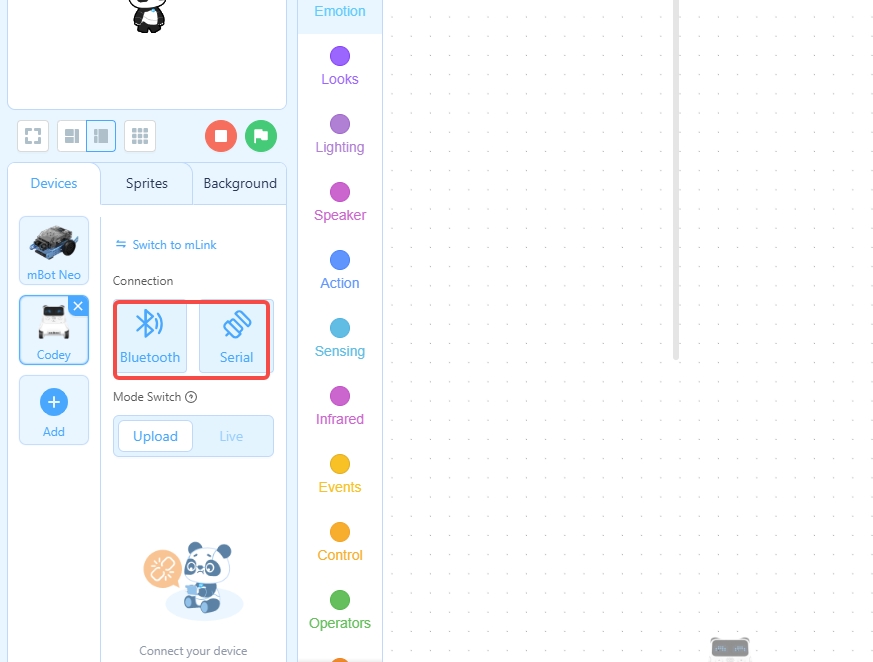
Click the exact link Switch to mLink near the bottom of the device panel. When the switch succeeds, that text changes to Switch to direct connection. Leave mLink 2 open in the background.
mBlock device panel with Switch to mLink highlighted
Official Makeblock reference screen. The live interface may look slightly different.

Step 9

Show every connection option

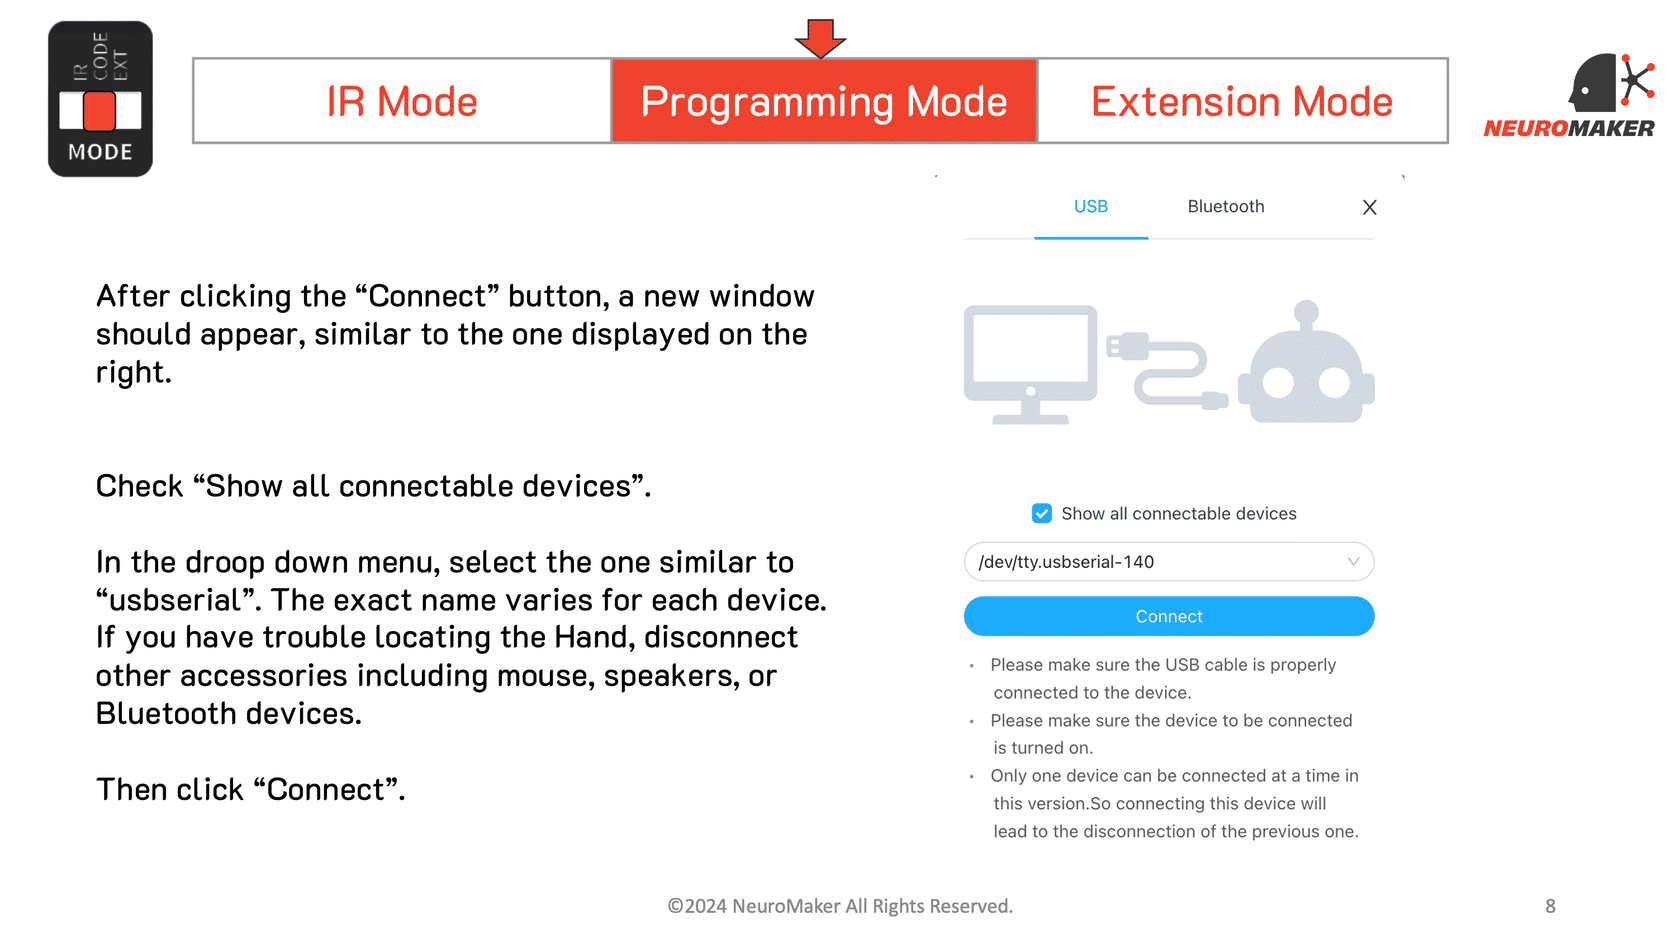
Click Connect. In the connection window, check Show all connectable devices. This is the current label for the option that reveals USB serial ports.
mBlock connection window with Show all connectable devices and a USB serial port highlighted
Official NeuroMaker reference screen. The live interface may look slightly different.

Step 10

Choose the hand’s USB serial port

Select the port containing usbserial, such as /dev/tty.usbserial-140 or /dev/cu.usbserial…, then click Connect.

Connection complete

You’re ready to program the NeuroHand.

Keep mLink 2 open while you work. Try a simple finger-movement block first, and keep fingers, cables, and loose objects clear of moving joints.

Quick fixes

If the hand does not connect

No COM or usbserial port appears

Use a data-capable cable, try another USB port, confirm CODE mode, then unplug and reconnect the hand.

mBlock says mLink is not open

Open mLink 2 first, fully quit Chrome, reopen Chrome, reload ide.mblock.cc, and click Switch to mLink.

The wrong port keeps failing

Choose the port containing usbserial; compare the list before and after unplugging the hand.

NeuroMaker blocks are missing

Add the hand-shaped Arduino Uno first. Then use the lower extension + and search NeuroMaker Hand; if needed, search v3ext.

On a school-managed device, ask IT to allow mLink 2 and ide.mblock.cc. Do not disable antivirus or the firewall for the whole computer.

Official references

Where these steps come from

NeuroMaker HAND 2.0 programming guide ↗Makeblock downloads ↗Makeblock mLink help ↗NeuroMaker HAND FAQ ↗

Screenshots are attributed to their official publishers and are shown for classroom reference. Labels were checked against the current mBlock web editor in July 2026.